Make Your Own Coconut Butter: Easy Recipe, Big Savings, Amazing Taste
Imagine a food so incredibly delicious, so smooth and melt-in-your-mouth decadent, that it feels more like a gourmet dessert than a simple fruit derivative. That's the magic of coconut butter. With its rich, creamy texture and subtly sweet flavor, many describe it as tasting like shortbread or a luxurious confection, even if they're not typically "coconut people." It's incredibly addictive, and it's easy to see why someone could effortlessly go through half a jar in a single day! However, this delightful indulgence often comes with a hefty price tag. Store-bought jars of coconut butter can easily set you back $10 or more, making it a costly habit for regular enjoyment. But what if we told you there's a simple, incredibly cost-effective way to enjoy this heavenly spread whenever you please? The secret lies in learning how to make coconut butter right in your own kitchen. You'll achieve the same luscious texture and incredible flavor for a mere fraction of the price, and with minimal effort. All you need is one ingredient and a blender, and you're ready to unlock a world of creamy, coconut goodness.Why Homemade Coconut Butter is a Game-Changer
Opting for homemade coconut butter isn't just about saving money; it's about elevating your culinary experience and gaining control over what goes into your food. Here’s why making your own is a truly revolutionary move for your pantry: *Unbeatable Savings
As mentioned, store-bought coconut butter is expensive. A bag of unsweetened shredded coconut, however, costs significantly less and yields a substantial amount of butter. Over time, these savings add up dramatically, allowing you to enjoy this versatile treat without breaking the bank. Think of all the jars you won't have to buy! *Superior Taste and Texture
There's something uniquely satisfying about fresh, homemade products. Our recipe guarantees a buttery smooth consistency that melts beautifully on the tongue, offering a pure, unadulterated coconut flavor that truly shines. It’s often described as richer and more vibrant than its store-bought counterparts, making it a genuinely luxurious experience. The smooth taste and melt-in-your-mouth texture will make you feel more like you’re eating shortbread than actual coconut. *Purity and Control
When you make coconut butter at home, you're in charge. There are no hidden sugars, unwanted additives, or questionable oils – just 100% pure coconut. This makes it a fantastic choice for those seeking dairy-free, refined sugar-free, and vegan options, ensuring every spoonful aligns with your dietary preferences and health goals. It’s also naturally gluten-free and packed with healthy fats. *Incredibly Easy to Make
Despite its gourmet appeal, the process of making coconut butter is astonishingly simple. It requires just one ingredient and takes roughly 10 minutes from start to finish. If you're looking for a quick and rewarding kitchen project, this is it! To dive deeper into the ease and versatility, explore our related article on Minute Coconut Butter: 1 Ingredient, Vegan, Endless Uses.The Simple Recipe: How to Make Coconut Butter
Preparing your own coconut butter is less of a recipe and more of a magical transformation. Here's exactly how to make coconut butter with just one star ingredient:Ingredients You'll Need:
- Unsweetened Shredded Coconut: This is the hero of our story. It’s crucial to use *regular*, unsweetened shredded coconut. Low-fat varieties often lack the natural oils needed for the coconut to transform into a smooth butter, and sweetened versions will give you a different (and potentially overly sweet) result. Look for finely shredded or desiccated coconut for the best texture and quickest processing time.
- Optional (for troubleshooting): 1-2 tablespoons of virgin coconut oil.
Essential Equipment:
- High-Speed Blender or Food Processor: For optimal results, a powerful appliance like a Vitamix, Blend-tec, or a robust food processor is recommended. These machines generate enough friction and power to break down the coconut and release its natural oils effectively.
- Smaller Batches: Some readers have reported success with smaller batches using an immersion blender or a Magic Bullet-style personal blender, though these may require more patience and scraping. If you try one of these methods, we'd love to hear about your experience!
Step-by-Step Instructions:
- Measure Your Coconut: For best results, we recommend using at least 12 ounces (about 3-4 cups) of shredded coconut. A larger volume helps the blades catch the coconut more effectively and generates the necessary friction for the oils to release.
- Load Your Appliance: Pour the shredded coconut directly into your high-speed blender or food processor. Ensure the lid is securely fastened.
- Process and Observe: Begin processing the coconut. You’ll notice it goes through several stages:
- Stage 1 (0-2 minutes): The shredded coconut will turn into a fine, flour-like powder.
- Stage 2 (2-5 minutes): The powder will start to clump together, forming a coarse, somewhat damp paste.
- Stage 3 (5-8 minutes): The clumps will begin to smooth out, and the coconut will take on a pastier consistency. You might start to see some shine as the oils begin to release.
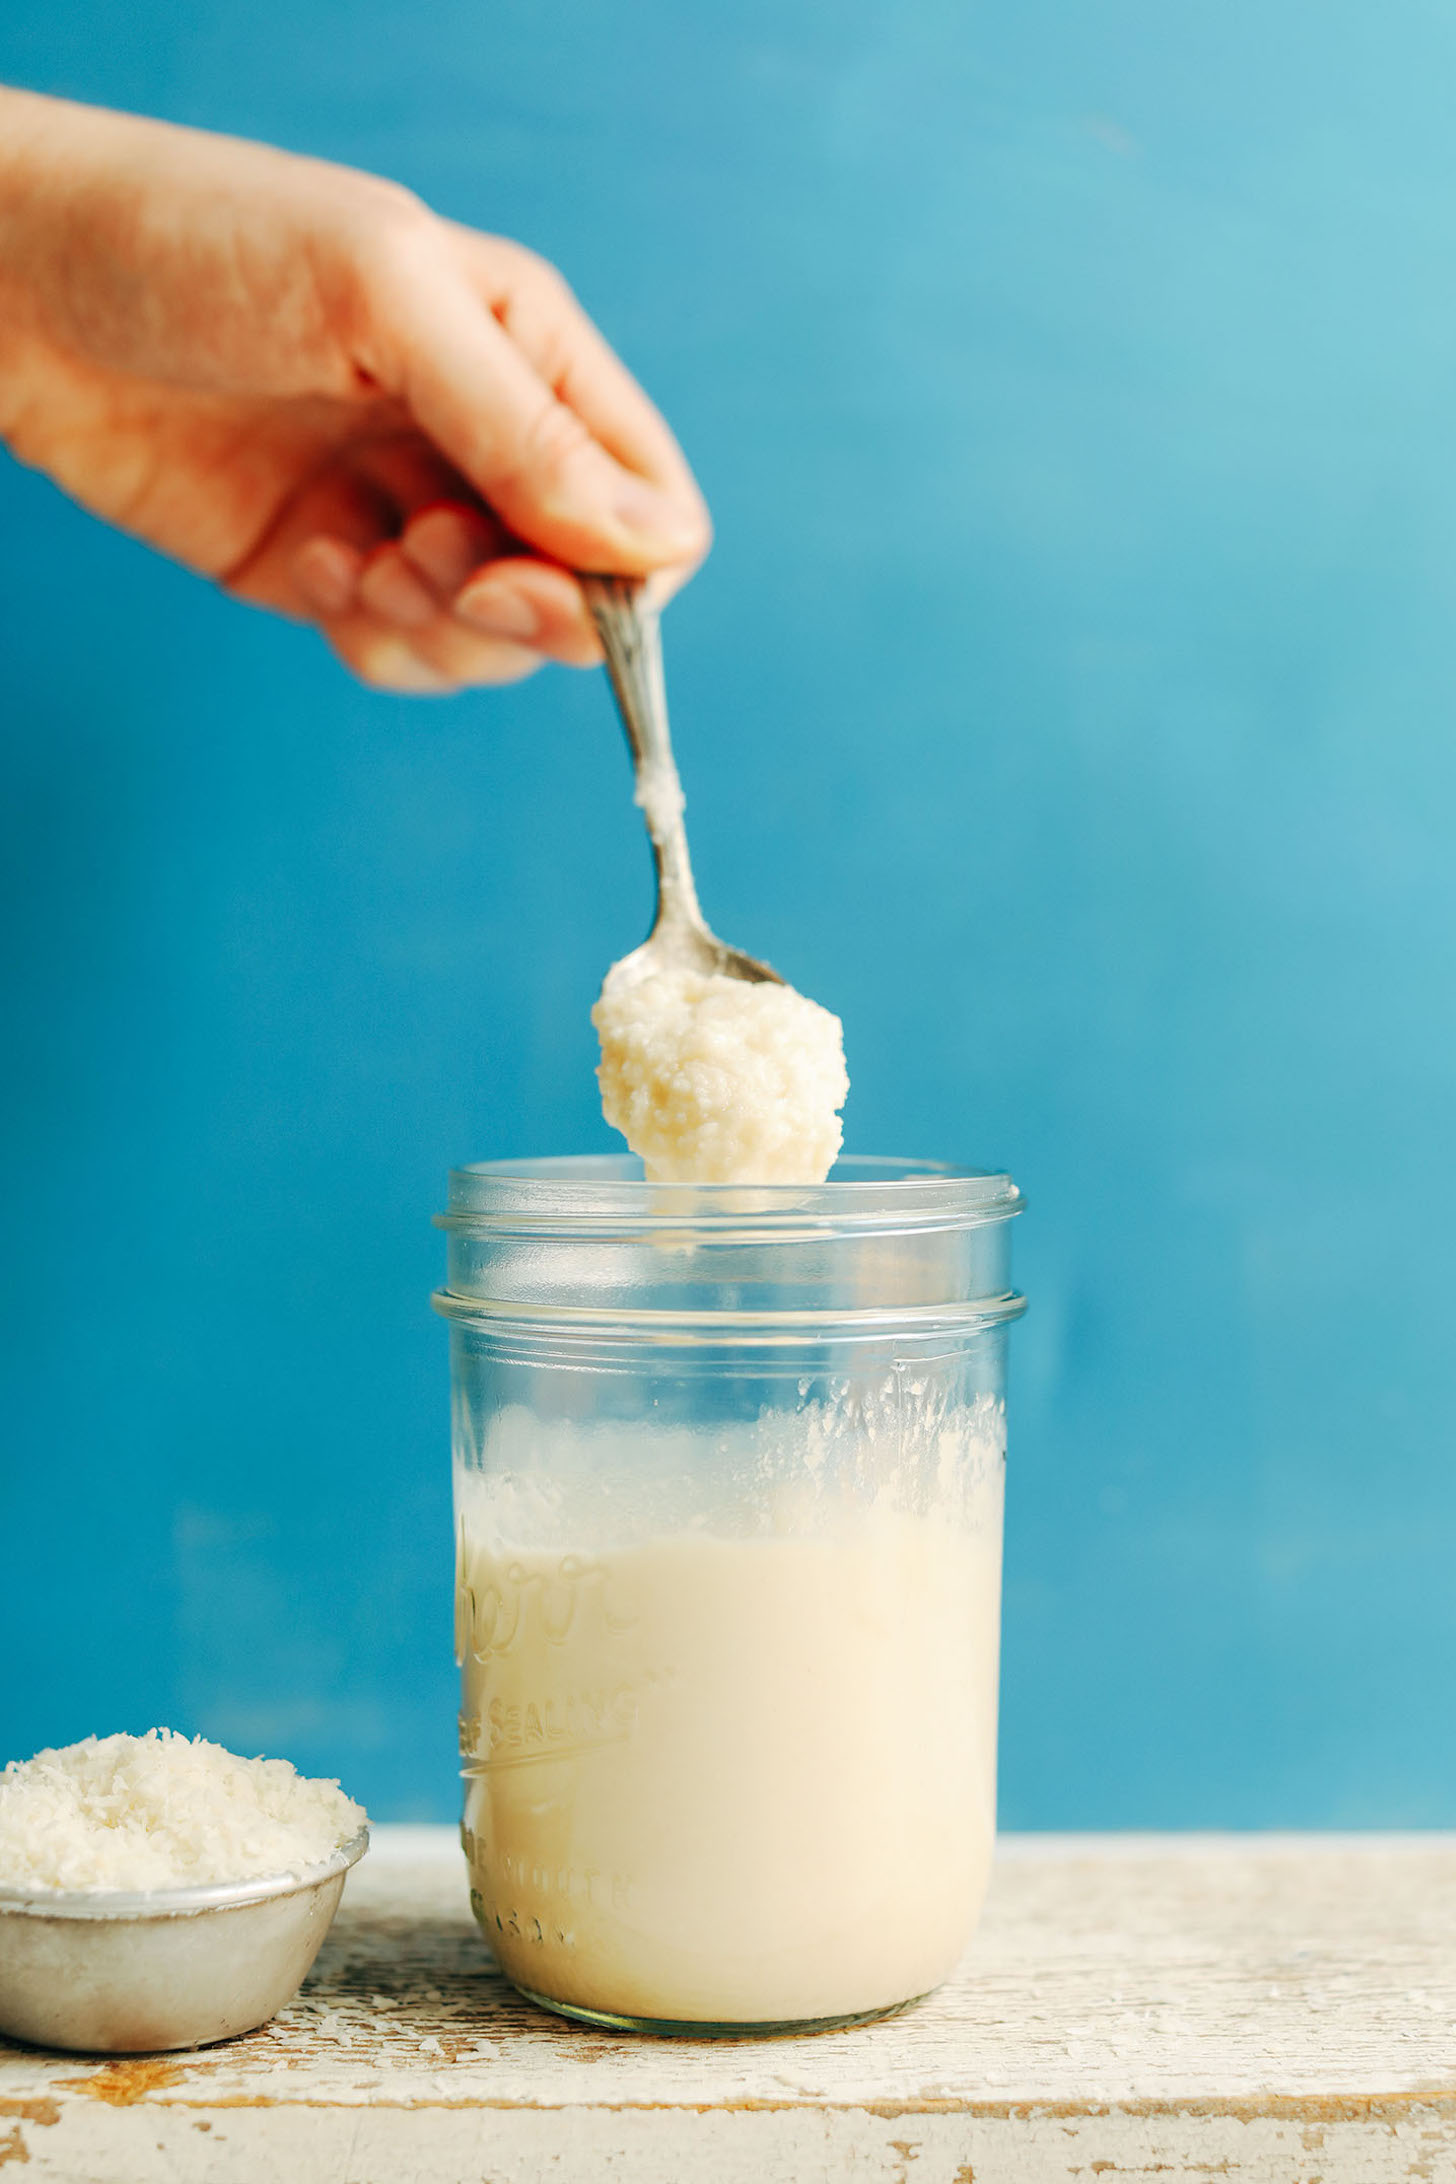
- Stage 4 (8-12 minutes): Continue processing. The coconut will magically transform into a glossy, liquid-like butter. It should be smooth, pourable, and utterly irresistible.
- Scrape and Continue: Throughout the process, especially in the earlier stages, stop your machine and use a rubber spatula to scrape down the sides of the container. This ensures all the coconut is evenly processed and helps prevent your machine from overheating.
- Final Check: Once it reaches a smooth, pourable consistency, your coconut butter is ready! It should be warm from the friction of processing.
- Store It: Carefully pour the warm coconut butter into a clean, airtight glass jar. It will be liquid when warm but will solidify at room temperature, similar to coconut oil.
Troubleshooting Your Coconut Butter Batch
While the process is generally straightforward, sometimes a batch of coconut can be a little stubborn:
- My Coconut Isn't Turning Smooth! If your coconut seems to be stuck in a dry, pasty stage and isn't releasing its oils after sufficient processing time (and scraping), don't despair! This can happen with certain brands or batches of coconut. Simply add 1-2 tablespoons of virgin coconut oil to the blender or food processor. This extra fat acts as a lubricant, helping to kickstart the oil-releasing process of the shredded coconut and achieve that desired smooth consistency. Continue processing until it’s perfectly creamy.
- Dealing with Solidified Butter: Coconut butter is solid at room temperature but will melt back into a spreadable consistency when gently heated. If your jarred coconut butter seems too dry or hard to work with, simply place the jar in a bowl of warm water for a few minutes, or gently warm it in a microwave safe bowl in 15-second intervals, stirring well. If it still feels too thick, stirring in a little extra coconut oil can help achieve the perfect texture.
Unlock Endless Culinary Possibilities
Once you’ve mastered how to make coconut butter, you'll discover that its uses extend far beyond simply enjoying it by the spoon (though that's certainly a top contender!). Its rich flavor and creamy texture make it an incredibly versatile ingredient in both sweet and savory applications. This homemade delight is truly better than store-bought, melt-in-mouth smooth, and incredibly adaptable. Here are just a few ideas to get your culinary creativity flowing:- Eat It Straight from the Jar: Let's be honest, this is often the first and best use! A spoonful of homemade coconut butter is a pure moment of bliss.
- Decadent Frosting: Use it as a healthier, dairy-free frosting for cakes, cupcakes, brownies, or even cookies. You can sweeten it to taste and add a touch of vanilla for extra flavor.
- Smoothie Enhancer: Blend a spoonful into your morning smoothie or a "nice cream" like banana ice cream for added creaminess, healthy fats, and a delightful tropical twist.
- Homemade Candy & Treats: Freeze it in candy molds for delicious, melt-in-your-mouth coconut bites. You can even mix in sweeteners, extracts, or nuts before freezing.
- Chocolate Coconut Butter: For a truly irresistible treat, sweeten your homemade coconut butter as desired (maple syrup, agave, or erythritol work wonderfully) and stir in a few tablespoons of unsweetened cocoa powder. The result is a rich, spreadable chocolate coconut dream.
- Spreads and Toppings: Slather it on toast, stir it into oatmeal, drizzle it over pancakes, or swirl it into yogurt for a luxurious touch.
- Baked Goods: Incorporate it into muffins, cookies, or energy balls to add moisture, flavor, and healthy fats.
- Curries and Sauces: While less common for the sweetened variety, unsweetened coconut butter can add a rich, creamy base to some savory dishes like curries or peanut sauces.
Tips for the Best Homemade Coconut Butter
To ensure every batch of your homemade coconut butter is a roaring success, keep these expert tips in mind:- Prioritize Quality Coconut: The better the quality of your unsweetened shredded coconut, the better your butter will be. Look for brands known for freshness and good oil content.
- Patience is a Virtue: The transformation from shreds to butter isn't instant. It requires consistent processing for the natural oils to fully release. Don't be tempted to stop too early! Keep scraping down the sides and trust the process.
- Mind Your Blender: High-speed blenders can get warm during prolonged use. If you notice your blender or food processor heating up significantly, give it a 30-60 second break to cool down before continuing. This protects your appliance.
- Optimal Batch Size: As noted, using at least 12 ounces of coconut creates enough volume for most blenders or food processors to work efficiently. Smaller amounts might just get tossed around without enough friction to become butter.
- Custom Sweetening: If you prefer a sweeter coconut butter, wait until it has fully transformed into a smooth butter before adding your preferred sweetener (e.g., maple syrup, agave nectar, stevia, or erythritol). This ensures the texture isn't compromised. You can also experiment with extracts like vanilla or almond for added flavor dimensions.
- Storage Savvy: Store your homemade coconut butter in an airtight jar in a cool, dark place. It typically lasts for several weeks at room temperature, or even longer in the refrigerator (though it will become very firm).
